Initial Setup: SNG PetYard Tracker
After installing and activating the PetYard Tracker plugin, follow these steps to configure it for your website. These settings allow you to customize how your stats are displayed and keep them synchronized with your Sweep&Go account.
Accessing the Settings
Navigate to WP Admin → PetYard Tracker to access the settings page.
Available Settings
Sync Data
- Sync Button: Click this button to manually synchronize your real-time statistics (satisfied customers, happy pets, completed yards) with your Sweep&Go account.
Note
Synchronization runs automatically every day at midnight, but you can use this button for on-demand updates.
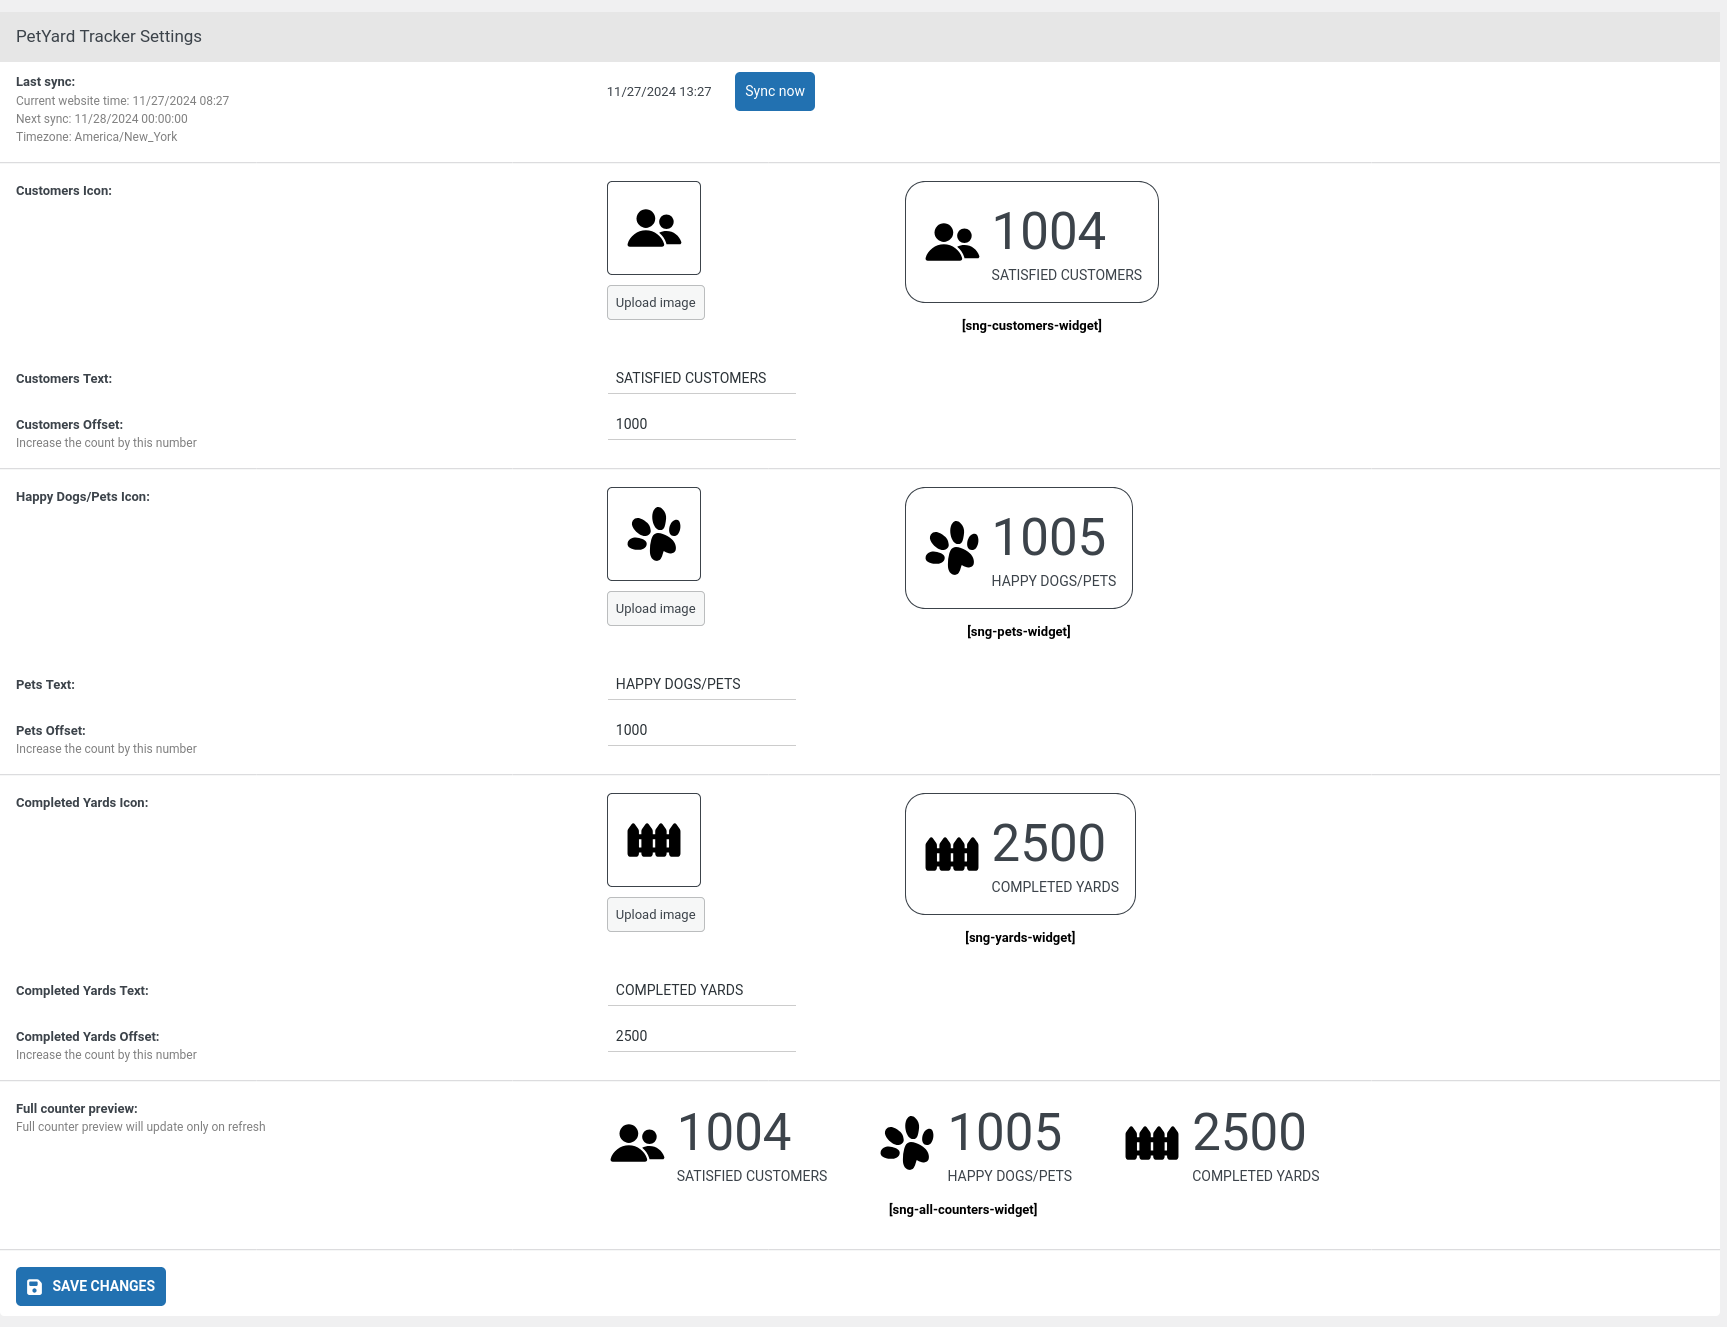
Customization Options for Each Stat
1. Satisfied Customers
- Customer Icon: Upload an icon to represent the number of satisfied customers.
- Text: Default is
SATISFIED CUSTOMERS. You can customize this text to suit your branding or message. - Customer Offset: Default is
0. Add a number to increase the displayed count (e.g., set to10to show 10 more than the real number).
2. Happy Dogs/Pets
- Pet Icon: Upload an icon to represent the number of happy pets.
- Text: Default is
HAPPY DOGS/PETS. You can change this text to reflect your business style. - Pet Offset: Default is
0. Add a number to increase the displayed count.
3. Completed Yards
- Completed Yard Icon: Upload an icon to represent the number of completed yards.
- Completed Text: Default is
COMPLETED YARDS. Customize this text as needed. - Completed Yard Offset: Default is
0. Use this to display an adjusted count.
Final Tips
- Ensure your Sweep&Go Core plugin is connected for accurate real-time data.
- Regularly check the synchronization logs in the settings to ensure stats are updating correctly.
- Use the customization options to align the display with your website's design and branding.
Screenshots